Home Blog Page 735

Starting a business in the Netherlands as an expat: the practical checklist

Setting up a business in the Netherlands as an expat is entirely doable, but it requires ticking off the right boxes in the right order.

This guide walks you through the full process, from confirming whether you can legally run a business here and the required documents to choosing the right legal structure.

Can you legally start a business in the Netherlands as an expat?

Before you create a business bank account or register open positions on LinkedIn, you need to confirm you have the legal right to run a business here.

And these legal requirements depend entirely on your nationality:

  • EU, EEA, and Swiss nationals have the simplest path, thanks to the EU’s policy on free movement and residence. This allows you to live and work in the Netherlands, provided you have a valid identity card or passport.
  • Non-EU nationals will need a valid residence permit that authorises them to work in the Netherlands. A general residence permit (for example, one tied to a student visa) won’t automatically give you the right to run your own company.
woman-in-the-netherlands-reaeding-through-the-paperwork-involved-to-set-up-a-dutch-business
The list of requirements for setting up a business in the Netherlands will depend on your nationality. Image: Magnific

Always refer to information from the Dutch immigration service, as requirements for your work permit may vary, depending on your nationality and the purpose of your stay.

From invoicing to in-person payments, Revolut Business has you covered. Whether you’re managing expenses, sending international transfers, or keeping tabs on your team’s spending, it’s built to make the financial side of running your business flow much smoother.

Ready to simplify your finances? Sign up before June 30, 2026, to open your account online and get a snazzy €80 welcome bonus. (Terms & conditions apply.)

Here’s your checklist for setting up a Dutch business

Whether you’re planning on working your way to a six-figure firm or establishing a freelance business on the side, here’s how to set it all up.

Step 1: Get a Dutch BSN

Before you start building your Dutch business, you’ll need a BSN.

Also known as a burgerservicenummer or citizen service number, this is the Netherlands’ equivalent of a national insurance or social security number. You’ll need it for every administrative process here, from tax to business registration and banking.

READ MORE | How to get a BSN number in the Netherlands: The complete guide

You receive your BSN when you register with your local gemeente (municipality). If you’re staying longer than four months, this registration is legally mandatory.

Step 2: Ensure you have a valid business address

Your business address needs to be a valid address within the Netherlands.

freelancer-in-the-netherlands-working-from-home-while-applying-for-a-virtual-office-address-with-the-kvk
If you’d rather not publicise your home office set-up, then you can also apply for a virtual office address. Image: Magnific

It will appear in the public Handelsregister (Business Register) and will be used by the Belastingdienst for all official correspondence. If you work remotely or from home and don’t want your home address listed publicly, virtual office addresses are also accepted by the KVK.

Step 3: Choose your business structure

As an expat entrepreneur in the Netherlands, this is one of the most significant decisions you’ll make. This is because your business structure has tax, legal, and financial implications that will follow you for years.

While the Dutch system typically offers several structures, most international business owners choose one of two:

Opting to be a ZZP’er (zelfstandige zonder personeel) or freelancer

This is the simplest and most popular structure in the Netherlands, used by freelancers, consultants, designers, developers, and anyone else working independently.

Typically, there’s no minimum capital or notary required, and registration takes a single KVK appointment.

However, the trade-off is personal liability. As a ZZP’er, you and your business are legally the same entity — so if your business incurs debt, it’s your debt.

Opting to be a BV (besloten vennootschap) or private limited company

The BV is the Dutch equivalent of a limited company or LLC.

Unlike being a ZZP’er, this is a separate legal entity, meaning your personal assets are generally protected if the business runs into trouble. (However, there’s a caveat: directors can be held personally liable for serious mismanagement or fraud.)

businessmen-shaking-hands-in-the-netherlands-as-new-employee-joins-bv-private-limited-company
A BV will generally offer you more protection than a ZZP’er set-up, especially if you want to scale your business. Image: Magnific

In addition to the KVK registration fee of €85.15, notary fees typically add €500–€1,500 — bringing the total cost to roughly €600–€2,000 for a standard single-founder BV.

Step 4: Register with the KVK

KVK, also known as the Kamer van Koophandel or the Dutch Chamber of Commerce, manages the official register of all businesses operating in the Netherlands.

Before you can conduct any business transactions, you’ll need to set up an appointment with the KVK.

For your appointment, you’ll typically need your:

  • Valid passport or ID
  • BSN
  • Dutch business address
  • Chosen business name
  • Description of business activities (the KVK will help you identify the correct SBI activity code)

If you’re setting up a BV, you’ll also need the notarially registered deed of incorporation.

You’ll leave with your KVK number, an eight-digit identifier that goes on every invoice, contract, and piece of business correspondence you produce.

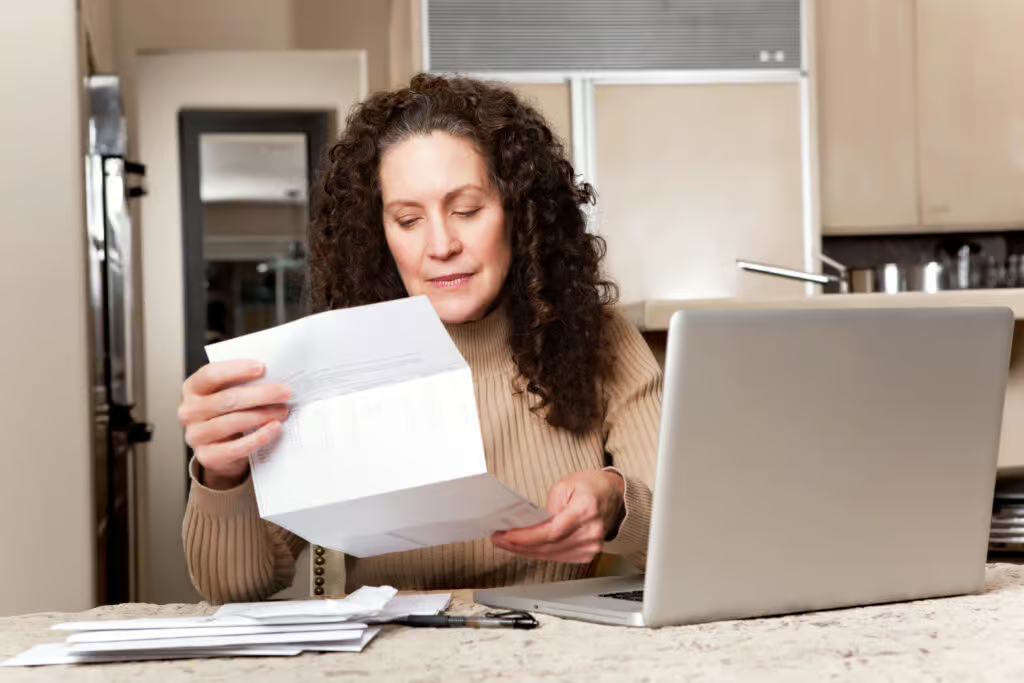
Step 5: Sort out your Dutch tax obligations

As the KVK automatically forwards your registration to the Belastingdienst (Dutch Tax Authority), you don’t need to register for tax separately. Your BTW number (VAT identification number) typically arrives by post within 10 days.

Dutch tax obligations kick in from the moment you start trading, and here’s what applies from day one:

BTW (VAT)

In the Netherlands, the standard VAT rate is 21%, with a reduced rate of 9% applying to certain goods and services.

photo-of-woman-doing-her-own-taxes-in-front-of-laptop-as-freelancer-in-the-Netherlands
It’s wise to familiarise yourself with the Dutch tax system long before tax season comes around. Image: Magnific

If your annual turnover exceeds €20,000, you’re required to charge BTW on invoices and file quarterly VAT returns with the Belastingdienst. Below that threshold? You may qualify for the KOR (kleineondernemersregeling, the small business VAT scheme).

Corporate tax for BV holders

BV profits are subject to vennootschapsbelasting (corporate income tax) of 19% on the first €200,000 of profit, and 25.8% above that.

Any salary you pay yourself is taxed as personal income; dividends distributed to yourself are subject to a 15% dividend withholding tax (dividendbelasting).

Good to know: The 30% ruling allows qualifying expats to receive 30% of their salary tax-free for five years.

If you’re a BV-owning entrepreneur, this means paying yourself a salary from your own company and applying the ruling to it. Helaas, ZZP holders are not eligible, and strict requirements apply.

Extra conditions also apply for Americans, as your US tax obligations don’t pause because you’ve moved abroad and started a business.

You’ll still need to file an annual US return, and depending on your Dutch bank balances and business structure, FBAR (FinCEN Form 114) and FATCA disclosures may also apply.

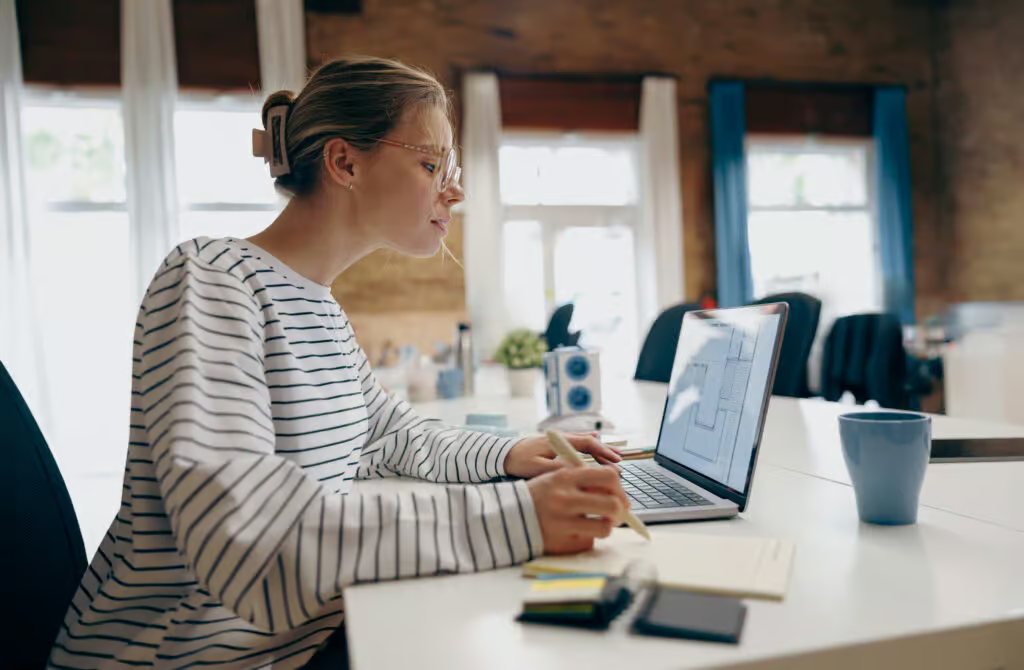
Step 6: Open a business bank account

Once you have your KVK number, you can open a Dutch business bank account.

READ MORE | How to open a bank account in the Netherlands: the ultimate guide

Keeping your business and personal finances separate from day one can make tax filing more straightforward, accounting cleaner, and your business more professional to any clients or future investors who ask to see your records.

man-using-his-dutch-business-bank-account-to-pay-for-company-expenses-and-invoice-clients
Getting a Dutch business bank account can greatly simplify your business finances, with a plethora of accounting tools and invoice management. Image: Magnific

Most banks will typically require your:

  • KVK number,
  • business activity description,
  • and registered address.

Skip the branch queues and open a Dutch business account online in minutes. Revolut Business gives you multi-currency IBANs, real-time payment notifications, and seamless transfers across 25+ currencies.

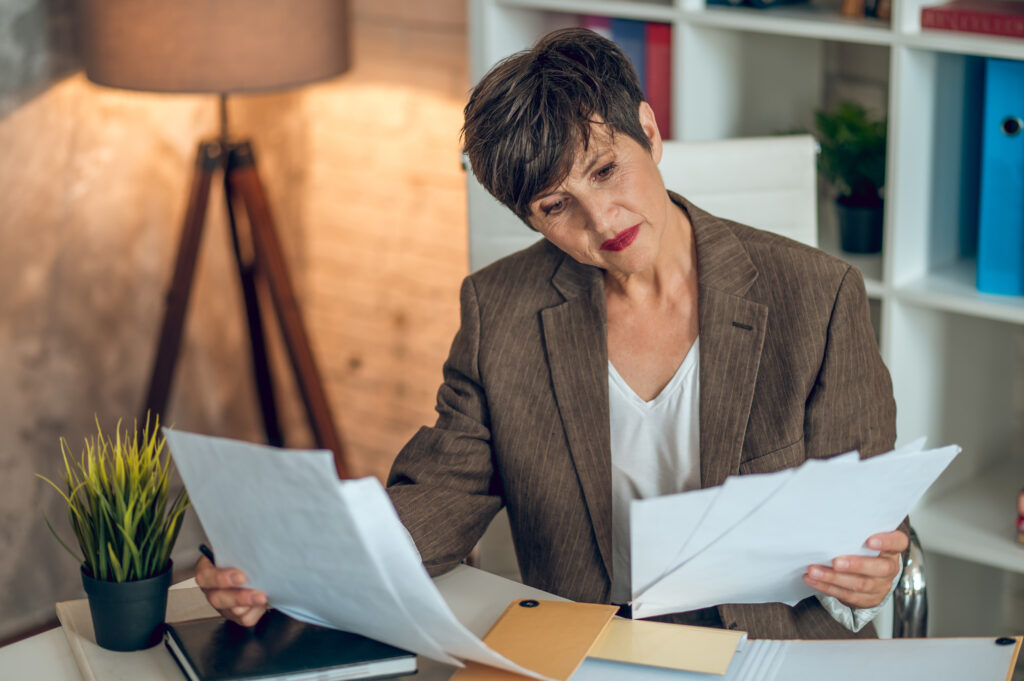
Step 7: Get the right insurance

Once you’ve covered the financial aspect of your business, it’s time to ensure you’re fully insured.

These are the most common types of insurance you may need as a business owner in the Netherlands:

  • Dutch health insurance (zorgverzekering) is legally mandatory for all residents, including freelancers and BV-owners. 
  • Professional liability insurance (beroepsaansprakelijkheidsverzekering) covers you if a client claims your work caused them financial loss. Whether you need it depends on your sector, but many larger organisations require it as a condition of signing a contract.
  • Disability insurance (AOV or arbeidsongeschiktheidsverzekering) isn’t legally required for ZZP’ers, but could be the most important coverage you’ll take out. An AOV is what keeps the bills paid if you’re unable to work for weeks or months, as you have no employer to cover extended sick leave.

Have you started a business in the Netherlands as an expat? Share your experience in the comments below.


Starting a business in the Netherlands as an expat: Frequently asked questions

Do I need a residence permit to start a business in the Netherlands?

What’s the difference between a ZZP and a BV in the Netherlands?

How much does it cost to register a business with the KVK?

Can I start a business in the Netherlands on a startup visa?

Does the 30% ruling apply to self-employed expats in the Netherlands?

Do Americans need to file US taxes if they run a business in the Netherlands?

I tried HelloFresh in the Netherlands, was it actually worth it? 

Life in the Netherlands is busy, and if you’re anything like me, ✨ girl dinner ✨ has become less of a trend and more of a lifestyle. So when the chance came to try HelloFresh for a week, I didn’t think twice.

Between the office job, the pilates classes, and the ever-present anxiety about the state of the world, cooking a proper meal every single night just isn’t always happening. 

I’ve become a true Nederlander who has to check their calendar before making any plans, which leaves precious little bandwidth for wondering what’s for dinner.

HelloFresh promised to take that question off my plate entirely. Here’s how it went.

Setting up was surprisingly painless

I hopped online, made an account, and within 15 minutes had chosen my package and picked my recipes. 

The interface lets you filter by dietary preference, cooking time, and even preferences such as whether you want recipes low in salt or calories. 

As a single person, I opted for three meals across the week, each with two servings. However, whether you’re cooking for one or for a household, the options scale accordingly.

Interested in giving HelloFresh a try? Well, good news for you: we have a discount code. DutchReview readers can enjoy up to a €90 korting. Just use code DREVIEW90 at checkout and tuck in to some delicious curated meals.

Delivery that actually worked (in the Netherlands, no less)

Anyone who’s lived in the Netherlands for longer than five minutes knows the particular horror of Dutch staircases and missed deliveries. Even if you don’t have a treacherous flight of steps to clamber down, you can be sitting two metres from your front door and still miss the postman.

HelloFresh handled this well. I could choose to have my box left with a neighbour if I missed the 10-second window. 

photo-of-hellofresh-box-on-top-of-kitchen-counter-filled-with-ingredients-for-recipes-as-part-of-hellofresh-netherlands-review
Image: HelloFresh/Supplied

And as it turned out, my driver simply called me when he arrived, rather than engaging in some Kafkaesque doorbell-ringing guessing game — which I very much appreciated.

The platform also sent regular tracking updates so I could follow my box in real time. That kind of communication soothes my anxious soul. However, if you’re less worried about these things, you might find it to be overkill.

What I actually cooked

The box arrived with ingredients for each recipe packed in separate, labelled paper bags, ready to go straight into the fridge. 

It also included a personalised recipe pamphlet with my actual name on it, which was a charming touch. As a recipe hoarder, my favourite feature was that I could tear out the recipe cards and reuse them later.

The one challenge I faced, however, was that a couple of recipes required ingredients you’re expected to already have at home, like white wine vinegar. Whether that says more about HelloFresh or my cupboard is unclear.

Here’s what I made:

  • Speedy udon noodles with minced meat and teriyaki mascarpone sauce — the lekker snel (“nice and quick”) option, and my favourite. It took 15 minutes, perfect for a Sunday evening after a day spent drinking wine in Amsterdam. Would make again immediately.
  • Creamy courgette lasagne — the vegetarian option. I was sceptical when I saw the ingredients, but HelloFresh’s use of herbs and spices won me over completely. I devoured the whole thing.
  • Sticky salmon with noodles, peanuts, and lime — the fit & bewust (“fit and conscious”) meal. I went in braced for flavourless health food and came out pleasantly surprised. And while it was technically two portions, I ate it all in one sitting anyway.
photo-of-sticky-salmon-hellofresh-meal-in-bowl-on-table-taken-from-above
Does this girl have time to replace her chipped kitchenware? Nee. So imagine my delight when I could save time on cooking. Image: Sarah O’Leary/Supplied

So, was it actually worth it?

For me? Yes.

The appeal wasn’t just convenience. It was that after a full day at work, I didn’t have to swing by the supermarket, wander the aisles without a plan, and end up buying things I didn’t need. My fridge was stocked. Dinner was decided. I just had to cook it.

The lekker snel recipe took exactly the 15 minutes it promised. The vegetarian option was filling and delicious. And the healthy meal didn’t ask me to sacrifice flavour for the sake of wellness.

I think what often makes people take pause when considering something like HelloFresh is the price. At first glance, the weekly cost can feel steep. 

But here’s how I thought about it: I do my big shop at the Dirk, but I still find myself dashing to the Albert Heijn every other night for top-ups that somehow add up to €25. With a HelloFresh box in the fridge, those panic-buying runs didn’t happen. The maths is more favourable than it first appears.

And what makes it even more favourable? A korting. Use code DREVIEW90 to give HelloFresh a go, and you can enjoy up to a €90 discount.

Have you tried HelloFresh in the Netherlands? Did it change your dinner routine, or do you prefer doing your own thing in the kitchen? Let us know in the comments below!

How to read your Dutch employment contract: the easy guide

Got a Dutch employment contract in front of you and no idea where to start? You’re not alone — and no, it’s not just because it might be written in Dutch.

Dutch contracts are legally dense, full of references to laws and agreements you’ve never heard of, and written in a format that probably looks nothing like what you signed back home. 

The good news? Once you know what you’re looking at, it all makes a lot more sense.

This guide breaks down every key section of a Dutch employment contract so you know exactly what you’re agreeing to.

📄 The basics of Dutch employment contracts

Dutch employment contracts are legally binding documents shaped by more than just what your employer decides to write in them.

Dutch labour law (arbeidsrecht) sets a baseline of rights and obligations for both sides. Your contract has to comply with these rules; your employer can’t opt out of legal protections simply by not mentioning them.

Many sectors also have a CAO — a collectieve arbeidsovereenkomst, or Collective Labour Agreement. This is a set of working conditions negotiated between employers and trade unions in a given industry.

READ MORE | Finding a job in Amsterdam: the ultimate guide in 2026

If your sector has a CAO, it applies to your contract automatically, even if it’s not spelled out line by line. Things like minimum salary scales, extra leave days, and bonus structures are often determined by the CAO rather than your individual contract. 

Most internationals have never heard of a CAO before arriving, but it can turn out to be one of the most important documents governing your employment.

If your contract references one, it’s worth looking it up.

Want to understand exactly how Dutch contracts and benefits work? Undutchables is the go-to recruitment agency for internationals in the Netherlands. They regularly host webinars covering everything from contract types to what your benefits package actually means. Learn more about contracts and benefits here.

📑 Types of Dutch employment contracts (contracten)

There are two main contract types in the Netherlands, and the one you have makes a significant difference to your job security.

Temporary contract (Tijdelijk contract)

A tijdelijk contract — or fixed-term contract — has a clear end date. It’s extremely common in the Netherlands, especially for internationals who are newer to the Dutch job market.

Temporary contracts can be renewed, but there are limits. The Dutch “chain rule” (ketenregeling) means that after three consecutive temporary contracts (or once you’ve been on temporary contracts for a total of three years), your employer must offer you a permanent contract if they want to keep you on.

photo-of-woman-reading-employment-contract-with-pink-shirt-sitting-at-desk
There are two main types of contracts you can get in the Netherlands: temporary and permanent. Image: Magnific

The chain only resets if there’s a gap of more than six months between contracts.

Do you have an agency employment contract with a recruitment agency? Then the rules are slightly different. In this case, you move through a phase system and may receive temporary contracts for up to 4 years.

If you’re interested, you can learn more about the phase system and the CLA for temporary workers on the ABU (Federation of Temporary Employment Agencies) website.

Permanent contract (Vast contract)

A vast contract has no end date, which means significantly more job security. It’s much harder for your employer to terminate a permanent contract — they generally need approval from the Employee Insurance Agency (UWV) or a court ruling to do so.

If you’re currently on a temporary contract, a vast contract is usually the goal. It unlocks things like improved mortgage eligibility, more stable residency in some cases, and a much stronger legal position if things go wrong.

Good to know: The ABU/NBBU are constantly improving the CAO to provide more stability and security for temporary workers. If that vast contract is out of reach, there are still possibilities to receive a werkgeversverklaring. This can help with your eligibility for a mortgage, for example. 

⏳ Probation periods (Proeftijd)

Most Dutch contracts include a probation period, known as a proeftijd. This trial phase gives both you and your employer the chance to assess whether the working relationship is a good fit.

Either party can end the contract immediately during this period — without notice and without giving a reason.

employee-at-a-dutch-office-looking-over-his-contract-specifying-his-probation-period
The length and availability of your probation period will depend on the length of your contract. Image: Magnific

The length depends on your contract type:

  • For contracts of six months or less, a probation period is not permitted at all.
  • For temporary contracts of more than six months but less than two years, the maximum is one month.
  • For permanent contracts or temporary contracts of two years or longer, the maximum is two months.

Any probation period must be agreed upon in writing. If it isn’t, it doesn’t count — and an invalid probation clause is treated as if there’s no probation period at all, meaning full dismissal protections apply from day one.

📬 Notice periods (Opzegtermijn)

When either party wants to end the employment relationship, a notice period applies — but the rules differ depending on which side is walking away.

READ MORE | Losing your job in the Netherlands: what you should know (and the next steps)

As an employee, your statutory notice period is almost always one month, regardless of how long you’ve been in the role, unless your contract specifies otherwise.

As an employer, the statutory notice period depends on your length of service:

Time with employerNotice period
Less than five yearsOne month
Five to ten yearsTwo months
Ten to fifteen yearsThree months
Fifteen years or moreFour months

It’s also worth knowing that your employer can’t simply decide to let you go. Dismissal requires UWV approval, a court ruling, or mutual agreement (wederzijds goedvinden).

The latter is often documented in a settlement agreement (vaststellingsovereenkomst), which is how many Dutch dismissals are handled in practice.

💶 Salary (Salaris)

Salary is obviously the part everyone reads first, but it’s more layered than just one number.

photo-of-woman-shaking-hands-with-employer-after-discussing-salary-on-her-Dutch-contract
Make sure you understand the difference between your gross and net salary. Image: Magnific

Gross vs net

Your contract will state your gross salary (bruto salaris), which is before tax and social security contributions. 

What actually lands in your bank account each month — your net salary (netto salaris) — will be lower, sometimes considerably so. 

The exact gap depends on your income level and personal tax situation. You can use a bruto/netto calculator to help get an idea of what will land in your bank account, although this remains just an estimate. 

Holiday allowance (Vakantiegeld)

One thing that surprises many internationals: in the Netherlands, you’re legally entitled to a holiday allowance (vakantiegeld) of at least 8% of your annual gross salary.

This is typically paid out in a lump sum in May or June, though some employers pay it monthly as part of your regular salary instead. Either way, it should be clearly stated in your contract.

Minimum holiday days

The Dutch statutory minimum is 20 days of paid leave per year for a full-time position — calculated as four times your number of working hours per week.

That means that if you work a four-day work week (that’s pretty common!), you’ll receive 16 days of paid leave per year. 

Many employers offer more than this, particularly in sectors covered by a CAO.

Common extras

Beyond the basics, many Dutch employment contracts include:

  • Pension contribution (pensioen): employers often contribute to a pension scheme, and this is sometimes mandatory under a CAO.
  • Travel allowance (reiskostenvergoeding): compensation for commuting costs, paid per kilometre or as a flat rate for public transport.
  • Thirteenth month or year-end bonus: not universal, but worth checking your CAO or asking during negotiations.

Reading your Dutch payslip

Your monthly payslip (loonstrook) can look overwhelming at first. Key things to look for: your gross salary, tax deductions (loonheffing), social security contributions, any allowances, and your net pay.

woman-reading-the-employment-contract-at-her-new-dutch-job
Always double-check that these figures match those in your employment contract. Image: Depositphotos

Your employer is required to provide this every month. It’s worth checking it against your contract to make sure everything lines up.

Making sense of your salary and benefits is a lot easier with the right support. Undutchables helps internationals understand not just how to find work in the Netherlands, but exactly what they’re entitled to once they get there — from payslips to pension contributions. Get in touch with Undutchables here.

🕒 Working hours (Werktijden)

Full-time employment in the Netherlands typically means 36 to 40 hours per week, depending on the employer and sector.

Part-time work is extremely common here — and culturally very accepted. The Netherlands has one of the highest rates of part-time employment in Europe, and working fewer hours doesn’t carry the career stigma it might elsewhere.

Work-life balance is genuinely prioritised in Dutch working culture. Overtime exists, but it’s far less normalised than in many other countries, and in many sectors it must be compensated, either in pay or in time off.

🤒 Sick leave (Ziekteverlof)

If you fall ill while employed in the Netherlands, you’re entitled to continued pay for up to two years through your sick leave

The legal minimum is 70% of your salary throughout, though many employers pay 100% during the first year, either through their own policy or because their CAO requires it.

Your employer cannot simply fire you for being sick. There’s also a formal reintegration process (re-integratietraject) that kicks in for longer absences, with obligations on both sides.

🤝 Freelancing as a ZZP’er

Not everyone working in the Netherlands does so under a traditional employment contract. Many people work as a ZZP’er— zelfstandige zonder personeel, or self-employed (aka freelancer) without staff.

As a ZZP’er, you operate very differently from an employee:

  • No fixed salary: you invoice for your work, and income can vary significantly.
  • No sick pay or holiday allowance by default: you’re responsible for arranging your own income protection and pension.
  • Different tax obligations: you handle your own taxes and VAT registration, and your income is assessed differently.

Freelancing offers flexibility, but the trade-off is less financial certainty and more administrative responsibility.

photo-of-man-sitting-at-desk-in-kitchen-looking-at-laptop-while-working-in-the-Netherlands-without-Dutch-employment-contract
ZZP’ers in the Netherlands work without a traditional Dutch employment contract. Image: Magnific

One important thing to stay informed about is the Wet DBA (Deregulering Beoordeling Arbeidsrelaties) — the Dutch law governing the relationship between freelancers and their clients. 

It’s designed to ensure workers don’t lose benefits by being made to work as contractors, and enforcement has been tightened in recent years. U-Connect has a useful overview of what to keep in mind in order to stay compliant.

⚠️ Pitfalls to watch out for in your Dutch contract

Misreading your salary. Seeing a number and assuming it’s your take-home pay is a very common trap. Always clarify whether a figure is gross or net, when exactly you get paid, and factor in holiday allowance when comparing offers.

Ignoring the CAO. Your contract might say very little about certain entitlements because they’re covered by the applicable CAO instead. If your contract references one, look it up; it can contain significant extras your employer doesn’t need to spell out individually.

Not reading additional documents. Your contract may also refer to a separate document, such as an employee handbook. It’s important to carefully read through this before signing your contract, as it may lay out the expectations and further benefits tied to your role. 

Misunderstanding the probation period. A common assumption is that once probation ends, you’re safe. But the type of contract you’re on matters just as much: a temporary contract still ends when its term does, regardless of whether you sailed through probation.

Assuming Dutch rules match those back home. This trips up nearly everyone. Salary structures, sick pay, notice periods, and contract renewal rules all work differently here. Don’t carry over assumptions from your home country’s system.

✅ Tips for your Dutch employment contract

  • Read the whole thing, not just the salary section. Pay particular attention to the contract type, probation period, notice period, and any non-compete clauses (concurrentiebeding).
  • Look up the applicable CAO if one is mentioned. It’s a public document and often reveals entitlements your employer doesn’t need to list individually.
  • Ask questions before you sign. Your employer should expect this — and if they’re not willing to clarify, that itself tells you something.
  • Get it reviewed if needed. If you’re unsure about specific clauses, particularly non-compete terms or unusual termination conditions, independent advice is worth it.
  • Keep a signed copy for yourself. Obvious, but often overlooked.

Dutch employment law is genuinely designed to protect workers. Knowing what your contract says puts you in the best position to benefit from those protections from day one.

Have you had any surprises reading your Dutch employment contract? Share your experience in the comments below!

Travelling outside the EU with a Dutch SIM: what does it really cost?

While your Dutch SIM card will work almost anywhere in the world, data roaming costs can be eye-wateringly steep.

Here’s what your Dutch SIM actually costs beyond Europe’s borders, and how to make sure you’re not caught off guard by unexpected charges.

Do Dutch SIM cards actually work outside the EU?

Yes, in most cases, your Dutch SIM will connect to the local network in most countries without any extra setup. If your provider has a roaming agreement with a carrier at your destination, your phone will find a signal automatically.

That covers the vast majority of popular travel destinations, including the US, UK, Australia, and beyond.

The moment you land, your phone will pick up a signal through your provider’s international roaming partners, and you’ll be able to make calls, send messages, and use data just as you would at home.

The catch, of course, is what that costs.

The EU’s Roam Like at Home policy means that when you travel to any of the 27 EU member states, you can use your mobile phone without paying any extra roaming charges.

Outside the EU, that protection disappears entirely. Without a bundle, mobile data abroad can cost as much as €5 per MB, with some providers charging even more.

tourist-with-dutch-sim-card-using-roaming-data-to-navigate-with-google-maps
If you need data to use Google Maps, most providers offer data roaming. However, it’ll cost you! Image: Magnific

Which countries are not included in EU roaming?

While the European Union’s “Roam Like at Home” policy has made travelling within the continent a breeze, the boundaries of where your Dutch bundle actually works are more restricted than many realise.

Essentially, any country that is not an official member of the EU or the European Economic Area falls into a high-cost category.

To manage these costs, Dutch providers typically categorise the world into four distinct tiers known as roaming zones:

  • Zone 1: This applies to the EU, along with Iceland, Liechtenstein, and Norway. As of 2026, many providers also include Ukraine and Moldova. You can use your Dutch mobile bundle here at no extra cost.
  • Zone 2: This tier includes major travel hubs (like the United States and Canada) and countries bordering the EU (like Turkey). Without a bundle, costs here take a sharp jump; for instance, many providers charge around €1.25 to €1.50 per minute for calls and roughly €2.50 per MB for data.
  • Zone 3: This represents the rest of the world, and covers the vast majority of Asia, Africa, and South America. Outgoing calls can soar to €2.50 per minute or more, and data prices may even hit €5.00 per MB.
  • Zone 4: This zone applies whenever you connect to a satellite network on a cruise ship, ferry, or aeroplane. These connections are the most expensive, with data rates reaching €10.00 to €15.00 per MB and calls costing upwards of €7.00 per minute.

Travelling outside the EU? Simyo offers bundles for some of the most popular destinations outside Europe, including Canada, the US, Turkey, and the Caribbean Kingdom.

For existing customers, activating a bundle is simple: you just send an SMS with the country name and bundle size to 1330.

How much do Dutch providers charge for data roaming?

To absolutely no one’s surprise, data roaming can be quite pricey.

Most major Dutch providers charge somewhere between €2.50 and €7.50 per MB of data outside the EU — and that upper end applies far more often than you’d hope.

For example, KPN’s standard out-of-bundle rate is €2.50 per MB in most non-EU countries, rising to €7.50 per MB in certain destinations across Africa, South Asia, and parts of the Americas.

friends-navigating-around-city-centre-via-their-dutch-sim-with-out-of-bundle-data-costs
Your out-of-bundle rates will generally range from €2.50 and €7.50 per MB out of the EU. Image: Magnific

Vodafone follows the same structure, with €2.50 per MB for most “World” destinations, and €7.50 per MB in their higher-cost “Exceptions” zone.

Meanwhile, Simyo’s standard non-EU rate sits right in the middle of that range, at €5 per MB.

To put these costs into perspective, let’s assume you’re using data roaming to load Google Maps. A quick 5 MB navigation session might seem harmless, but at the €7.50-per-MB tier, you’re looking at a €37.50 bill.

Roaming costs explained: what you actually pay outside the EU

To understand why your bill can skyrocket so quickly, you have to look at the breakdown of how data, SMS charges, and call minutes are consumed.

When you step outside Zone 1, you are typically billed on a pay-per-use basis unless you have specifically activated a bundle.

Mobile data costs

These tend to make up the bulk of your roaming charges, and the danger isn’t just the data you’re actively consuming.

Background usage, such as automatic updates and location services, can lead to unexpected charges. Your phone doesn’t know (or care) that each megabyte is costing you money.

person-using-public-transport-app-while-scrolling-on-phone-with-dutch-sim-and-data-roaming-activated
Mobile data costs make up a huge chunk of overall roaming fees. Image: Depositphotos

Calls and SMS charges

Of course, data isn’t the only way to rack up a hefty mobile bill.

When you’re outside the EU, you’ll also be charged for:

  • Outgoing calls: For Zone 2 countries, you can expect to pay between €1.25 and €1.50 per minute. If you are in Zone 3, these costs often spike to €2.50 per minute. In extreme cases, such as calling from a cruise ship or aeroplane, rates can even reach €4.50 to €7.00 per minute.
  • Incoming calls: Unlike in the EU, you pay to receive a call. If a telemarketer calls you while you’re in Thailand, and you make the mistake of picking up, you’re the one paying the international roaming fee for the privilege of talking to them.
  • Voicemails: This is possibly the sneakiest charge of all, as you may not even be aware that you’re being charged. If someone calls you and it goes to voicemail, you are often charged for the “international leg” of the call twice; once for the call travelling to your phone abroad, and once for it being sent back to the Dutch voicemail server.

Simyo’s buitenlandbundels are designed with exactly this kind of stress in mind. Once your data runs out, your internet is automatically blocked, so you’ll never accidentally rack up charges beyond what you’ve paid for.

Roaming bundles vs travel eSIMs: which is best for you?

Both options are significantly better than paying steep out-of-bundle costs, but they suit quite different situations.

Roaming bundles tend to be a solid option for people who want to keep their Dutch number active. This is crucial for receiving SMS verification codes (2FA), messages from your bank and tax office, or staying reachable for emergencies.

woman-on-holoday-scrolls-mobile-phone-while-enjoying-iced-coffee-thanks-to-her-dutch-data-roaming-bundle
Travel eSIMs tend to be the more economical choice, but they may not provide you with a local mobile number. Image: Magnific

However, roaming bundles may not be available for all destinations, and can be much pricier than travel eSIMs.

If you’re a tourist or heavy data user, travel eSIMs are generally the better choice. Depending on the provider, you have a choice between country-specific or regional plans, and data limits tend to be on the high end.

Helaas, most travel eSIMs come with “data-only” profiles, so you won’t have access to a local number or be able to make traditional calls.

Here’s how to avoid a massive phone bill abroad

While the thought of a hefty roaming bill is scary, it’s not a given, and there are ways to avoid unnecessary charges.

1. Turn off data roaming when it’s not in use

This might sound like an obvious choice, but you’d be surprised at how easy it is to overlook while you’re travelling.

The simplest solution is to go into your mobile settings before you leave the Netherlands and switch your data roaming off. You can always briefly turn it back on if and when you need it.

2. Opt for a data cap

Most Dutch providers let you set a personal data cap or spending limit through their app, and it’s worth doing this before you travel. These typically cost around €0.50 to €1.

couple-from-the-netherlands-uses-dutch-esim-with-data-roaming-package-on-trip-abroad
If you haven’t got the time to constantly check your data usage, then a data cap is a wise choice. Image: Magnific

Without one, out-of-bundle charges beyond the EU rack up quickly, and there’s no mandated cut-off at €50 the way there is within Europe.

3. Rely on public Wi-Fi when available

Wi-Fi hotspots are your best friend outside the EU, with most hotels, cafés, airports, and public transport networks offering free access.

If you’re travelling between hotspots, download offline maps before you travel, cache your playlists, and save anything you might need to access without a connection.

4. Consider a travel eSIM

If you want mobile data without the hefty price tag that a roaming bundle usually comes with, then opt for a travel eSIM.

With a dual SIM phone, you can keep your own SIM active for calls and verification codes while the eSIM handles everything else. Setup takes a few minutes at home before you fly, and prices are a fraction of out-of-bundle roaming rates.

Has your Dutch SIM ever given you a nasty surprise outside the EU? Share your experience, and any tips you’ve picked up, in the comments below.

Can you open a Dutch business bank account before registering with the KVK?

Starting a business in the Netherlands often comes with a classic chicken-and-egg conundrum; you need a bank account to operate, but the bank wants your KVK number first.

As a team of internationals, we’ve all been there. Here’s what you need to know about KVK requirements for business bank accounts.

Your KVK registration comes first

In general, you’ll need to have a KVK number to open a business bank account, so the standard advice is to register your business before applying.

This is largely because Dutch banks operate under strict anti-money laundering legislation, and a KVK registration is the main way a bank can verify that your business legally exists. 

Without one, banks in the Netherlands won’t be able to perform the KYC (Know Your Customer) and AML (Anti-Money Laundering) checks they’re legally required to complete before opening an account.

This requirement applies whether you’re setting up as a ZZP’er (freelancer) or incorporating a BV (a private limited company).

freelancer-typing-on-laptop-as-she-works-on-project-for-her-company-in-the-netherlands
Banks need to know that your business exists and that you’re in the Netherlands legally. Image: Magnific

In addition to this, banks may also ask for certain documents. It pays to have those details ready even before you set up your account.

Already registered with the KVK? Revolut Business lets you open a multi-currency business account online, with no branch visits and no lengthy paperwork.

With access to powerful expense tracking and budget management tools, plus integrations for accounting tools like Xero and QuickBooks, it’s like a mini accountant in an app. Until June 30, 2026, you can also earn a €80 welcome bonus and get a local Dutch IBAN to make running your business even smoother. 💸 (Terms & conditions apply.)

What business documents will Dutch banks ask for?

Most banks in the Netherlands require certain documents before you can open a business banking account.

According to the Dutch government, these documents include:

  • a valid form of ID (either a passport or national ID),
  • proof of address in the Netherlands,
  • proof of registration with the KVK,
  • a description or plan of your business activities,
  • your UBO (Ultimate Beneficial Owner) registration details, if applicable,
  • and a copy of the partnership contract and proof of identification for all partners, if you’ve formed a general partnership (VOF)
businessman-opening-dutch-bank-account-with-paperwork-he-requires-for-a-bv
Have your paperwork in front of you, so the setup is as seamless and stress-free as possible. Image: Magnific

Are you setting up a business bank account for a private limited company (BV) or public limited company (NV)? Dutch banks may require even more information from you.

Typically, required documents for BVs and NVs also include:

  • articles of association,
  • a copy of the register of shareholders,
  • and a detailed list of the countries where you do business, if you plan to use your account for foreign transactions.

Do you actually need a Dutch business bank account?

This depends on your legal structure and your current IBAN.

If you’re setting up an eenmanszaak (sole proprietorship) or VOF (general partnership) and already have a private bank account, you’re not legally required to open a separate business account.

READ MORE | Switching bank accounts in the Netherlands: the full guide

Meanwhile, if you’re setting up a BV or NV, you’re legally obligated to open a business bank account for your company’s transactions.

Location also plays a huge role: if you already have a business bank account in the SEPA zone, you do not need to open a new one in the Netherlands. This is because the Dutch Tax Administration accepts any SEPA-zone IBAN.

Unfortunately, if you’re based entirely outside the SEPA zone, you’ll likely need to apply for a business account with a bank in the Netherlands.

Have you opened a business bank account in the Netherlands? Share your thoughts in the comments below.

Sending money abroad from the Netherlands? Here’s how ING makes it easier

ING’s international payments feature lets you transfer money abroad in more than 30 currencies — directly from your Dutch banking app, with transparent fees and no nasty surprises.

If you’ve ever tried to transfer money to or from the Netherlands, you’ve probably come across unclear fees, a mark-up on the exchange rate that only shows up mid-transfer, and at least one request for a code you’ve never heard of.

We went looking for a transparent, stress-free option, and found it sitting right inside our ING banking app.

What counts as an international payment?

Before diving in, it’s worth understanding the difference between the two main types of international transfers, as they work quite differently.

Transfers within Europe

If you’re sending money to someone within the Single Euro Payments Area (or SEPA), the process is generally quite straightforward.

photo-of-a-man-transferring-funds-with-his-dutch-mobile-banking-app-ing-while-on-his-coffee-break
Transfers with the SEPA zone tend to be the most inexpensive and straightforward. Image: Magnific

SEPA covers all 27 EU member states, plus Iceland, Liechtenstein, Norway, and Switzerland. You can think of it as a standardised payment network that makes transferring euros across European borders feel much like a domestic transfer.

All you’ll need is your recipient’s IBAN, which is a string of alphanumeric code that identifies their account.

Transfers outside Europe

If you’re transferring funds outside of the Eurozone, we’ve found that things get slightly more complex.

You’ll need your recipient’s SWIFT/BIC code, which is an 8–to 11-digit identifier that tells the network exactly which bank and branch you’re sending cash to.

Some banks may also require additional details, such as a routing number for US transfers or your recipient’s address. We find it quite handy that the ING app flags these requirements when you select your destination country, so you aren’t caught off guard mid-transfer.

photo-of-internationals-using-dutch-banking-app-ing-to-transfer-funds-overseas-while-travelling
Dutch banking apps tend to offer far greater reliability, which is a major pro when handling your precious money. Image: Magnific

Why we opted to use a Dutch bank for international money transfers

In our experience, using a Dutch banking app typically means fewer moving parts, as you needn’t trust a third party with your personal bank details.

In addition to this, traditional Dutch banks like ING have considerably improved their English-language support over the years.

Not only is the ING app (and many pages of their website) available in English, but the bank also has a widespread branch network with brick-and-mortar offices you can actually visit.

Plus, with European Central Bank oversight and a regulatory track record going back decades, transferring funds with ING just feels a lot more reliable.

How ING’s international transfers work: a step-by-step guide

Whether you’re sending money back home, paying for a foreign holiday, or transferring funds for your university tuition, ING handles it all from the same app you already use for your daily banking.

photo-of-a-long-haired-dutchman-transferring-funds-abroad-with-ing-international-payments-feature
Best of all? You needn’t download any extra apps. Image: Magnific

Here’s how a typical transfer works:

1. Open the ING app, tap “Transfer”, then hit the globe icon in the top right corner. If you’re using the My ING online banking portal instead, select “New Transfer”.

2. Fill in the necessary details, such as the destination country, the name and account number of your recipient, the amount, and your preferred currency. You can also include a transaction description.

3. Review the rate and costs before you confirm the transaction. ING shows you the exchange rate, the fees, and the total amount to be debited.

4. Confirm your payment once you’re satisfied.

In most cases, your money will arrive the same day, although processing times may vary by currency and destination. Do refer to the ING website if you’re unsure of your exact transfer timeline.

What to expect with fees, costs, and currencies

If you’re anything like us, you probably hate surprises, especially where money’s concerned. Luckily, we’ve found that ING is quite transparent about listing their transfer fees and costs, so you can go in with your eyes open.

For those sending euros within the SEPA zone, good news: you won’t be charged fees or a currency exchange markup.

photo-of-a-man-sitting-with-a-female-using-his-ing-mobile-banking-app-to-send-funds-within-the-eurozone
If you’re transferring funds within the EU, you’ll avoid currency exchange markups and many additional fees. Image: Magnific

For international payments, ING charges a small fee per transaction — but how that’s applied depends on who’s picking up the bill. When you initiate a transfer, you’ll be asked to choose one of three cost arrangements:

  • SHA (shared) cost: you pay a small fee per transaction, and the recipient’s bank covers their own charges
  • OUR cost: you pay a small fee per transaction, plus any charges levied by the recipient’s bank
  • BEN (beneficiary) cost: the recipient covers all charges; you pay nothing upfront except for the money you’re sending

If your transfer involves a currency conversion, there’s one more figure to factor in.

ING generally applies a 0.85% mark-up to the base exchange rate for the 19 most commonly used non-euro currencies. These include AED, AUD, AWG, BHD, CAD, CHF, CZK, DKK, GBP, HKD, HUF, ILS, JPY, NOK, NZD, PLN, SAR, SEK, SGD, USD, and XCG.

Is ING’s International Payments option right for you? Our thoughts

Naturally, ING’s international transfers won’t be a perfect fit for everyone.

If you send frequent, high-volume transfers, those €6 transaction fees and 0.85% markup can really add up. In those cases, it’s worth comparing ING’s International Payments against specialised money transfer platforms to see if you’re getting a better deal.

However, in our opinion, ING is a great option if you value transparency and simplicity. The exchange rate is shown upfront, fees are fixed and published, and you won’t find hidden charges lurking in your confirmation email.

photo-of-a-dutchman-transferring-funds-overseas-with-ing-international-payments
ING really shines when it comes to simple, straightforward payments. Image: Magnific

For those living and working in the Netherlands, we think this bank offers a straightforward, transparent process, built into a banking app you’re probably already using.

Customer support is accessible, and you’ve got no third-party apps and no waiting for funds to settle in your account before they can be transferred.

Thinking of trying out ING’s International Payments? Learn more.

Have you transferred funds with ING’s International Payments feature? Share your experience in the comments below.


Disclaimer:
This article is provided in English for convenience. If any differences arise, the Dutch version of ING’s terms and conditions is leading and binding.
ING Bank N.V., registered office at Bijlmerdreef 106, 1102 CT Amsterdam, the Netherlands.
ING Bank N.V. is supervised by De Nederlandsche Bank (DNB) and the Autoriteit Financiële Markten (AFM).
ING Bank N.V. is registered in the Dutch Commercial Register under no. 33031431 and is a member of Kifid (www.kifid.nl).

eSIMs in the Netherlands: how they work, who they’re for, and when to consider one

Dutch eSIMs have vastly simplified the process of getting connected — and if you haven’t considered making the switch yet, this guide covers everything you need to know.

Getting a Dutch SIM card used to mean waiting three business days for a tiny piece of plastic to arrive in the post, then attempting to decipher activation instructions written entirely in Dutch. eSIMs have quietly made that process feel unnecessary.

But are they actually better than physical SIM cards? And are they right for you? Let’s get into it.

What is an eSIM (and how is it different from a regular SIM card)?

A traditional SIM card is a small, plastic chip that you physically insert into your device.

Instead of inserting a SIM card, you simply download your eSIM and activate it in your mobile’s settings.

There’s no need to take your phone apart, making it easier to switch between mobile carriers, update your mobile plan, or switch between phone numbers on the same device.

As the underlying technology is identical, you can still call, text, and surf the web as you normally would.

international-in-the-netherlands-holding-phone-with-dutch-esim-sim-card-as-she-waits-for-the-bus
In essence, an eSIM functions the same way as your physical SIM card. Image: Magnific

However, they do have one big catch: eSIMs aren’t compatible with all devices.

If your device is an older model, it may lack the ability to use an eSIM. Similarly, if you bought your current mobile through a Dutch phone subscription, your device may be carrier-locked. This means that you’ll be unable to switch providers until your SIM lock is disabled.

Always check your device compatibility before purchasing an eSIM plan.

With all Simyo’s plans available in eSIM format, you can get access to an award-winning service without waiting for a physical card in the post. Whether you’re after a flexible prepaid plan or a longer-term SIM-only deal, you can get set up entirely online.

How to purchase and activate an eSIM in the Netherlands

While the process can vary by provider, it’s generally consistent across Dutch carriers and international eSIM platforms.

Your first step is purchasing an eSIM, either through a provider’s website or app. Instead of waiting for a physical card to arrive in the post, you’ll typically receive a QR code by email.

Once you have your QR code, your activation process might differ slightly, depending on your device’s OS:

  • iPhone: Go to Settings > Cellular > Add eSIM.
  • Android: Go to Settings > Network & Internet > SIMs > Add More.

Simply scan the code, and your phone will “handshake” with the network. Within a minute, you’ll see the signal bars appear at the top of your screen.

Good to know: If you can’t download your eSIM via the QR code, you can also request a manual activation code (also known as an “SM-DP+ address”).

To insert this, just head to your device’s SIM settings (typically under “Cellular” on iOS, and “Network & Internet” or “Connections” on Android). There should be an option to add eSIM details manually — just paste your activation code in the field there.

man-uses-a-dutch-esim-as-he-stands-in-a-train-station-with-a-train-passing-by
You can take your Dutch number on a trip across the globe with you. Image: Magnific

Can you keep your existing Dutch number?

If you’re worried about losing that Dutch number you’ve spent ages memorising, you needn’t be.

Provided you’re switching to another provider in the Netherlands, number porting works exactly the same for eSIMs as it does for physical cards.

When you order your eSIM, you simply indicate that you want to keep your current number. Your new provider will coordinate with your old one, and on the switch-over day, your eSIM will automatically take over the old number.

The pros of opting for an eSIM in the Netherlands

Are you still on the fence about eSIMs in general? Here are some benefits that might just sway you.

You can get connected in a matter of minutes

If you’re a tourist or a new international, an eSIM offers you a quick and simple connection — often as soon as your plane touches down at Schiphol.

There’s no hunting for a SIM kiosk at the airport, and no potential for losing your original SIM card while swapping it out; you’re just connected.

There’s nothing to lose, damage, or accidentally snap

This is a biggie, given that physical SIM cards get lost, broken, and — ask any long-term expat — quietly deactivated by providers when they haven’t been used in a while.

friends-navigating-around-dutch-city-centre-via-their-travel-esim-on-a-orange-mobile-phone
With no physical parts, you won’t need to remove your existing SIM card to use an eSIM. Image: Magnific

With a Dutch eSIM plan, you can keep your original SIM in your device, as there’s no reason to swap out SIM cards.

You can keep your original number active

For internationals juggling their home mobile number and a Dutch one, an eSIM can be a genuine game-changer.

Both lines run simultaneously — meaning your family can still reach you on your old number while your Dutch landlord, GP, and DigiD account all have access to your local one.

Everything is managed digitally

If you need to purchase an eSIM, top up your mobile data, or switch plans, you can handle things via your provider’s app.

You needn’t visit a brick-and-mortar mobile store or provide your BSN to get connected, making the entire process far less exhausting for new internationals.

New to the Netherlands? Getting connected shouldn’t be a bureaucratic hurdle, which is why we love how simple Simyo’s registration process is.

Their website walks you through each step in English, assesses your device compatibility, and sends your eSIM whizzing straight over to you.

The downsides of opting for an eSIM in the Netherlands

Of course, no piece of technology is perfect, and this maxim extends to eSIMs, too. Here are a few drawbacks worth considering if you’re planning to purchase an eSIM plan.

Not every mobile supports eSIMs

If your device is an older model, it’s likely to be incompatible with most eSIMs on the Dutch market. And, sadly, there’s no workaround.

man-frowning-at-his-old-model-mobile-which-is-not-compatible-with-esims
If your mobile is an older model, it likely won’t be compatible with an eSIM. Image: Magnific

Even some newer budget models from less mainstream brands skip eSIM support entirely, so always remember to check your device’s eSIM compatibility before purchasing a plan.

Not all eSIM plans include a Dutch phone number

Some eSIM providers (especially international travel-focused platforms) offer data-only eSIM plans with no local number attached.

While that’s perfectly fine for tourists, it’s a real headache for anyone settling down in the Netherlands long-term.

Many services, including GP offices and DigiD, will require a Dutch mobile number for registration or SMS verification.

You’ll need Wi-Fi to activate your plan

Setting up an eSIM requires an active internet connection at the point of installation.

If you’ve just landed and want to activate your eSIM, you’ll need to find public Wi-Fi first. While this might seem like less of a hassle at the airport, not all public Wi-Fi is secure or stable.

eSIM vs physical SIM in the Netherlands: which is better for you?

The honest answer is that it depends almost entirely on your situation.

If you’ve just landed in the Netherlands, are managing two mobile numbers, or simply want the least stressful setup experience possible, an eSIM is probably the better choice.

The ability to get connected before you’ve got a BSN and bypass the hassle of hunting down a mobile store makes a real difference when you’ve already got a mountain of Dutch admin ahead of you.

eSIMs are also especially handy for tourists and other short-term visitors.

man-using-mobile-connected-to-dutch-esim-at-the-airport
With an eSIM, you needn’t rely on dodgy airport WiFi. Image: Magnific

Since you can activate your eSIM online, you don’t have to waste time looking for a SIM kiosk at Schiphol Airport — which, frankly, isn’t how anyone wants to spend their first hour in Amsterdam.

However, there are also a handful of scenarios where opting for a physical SIM makes sense.

They work on virtually any mobile device, including older models that predate eSIM support entirely. If your phone is from before 2018 or 2019, a physical SIM is likely your only option.

Physical SIMs are also easier to move between devices if you regularly swap phones, and some budget Dutch providers still don’t offer eSIM alternatives.

For most internationals with a relatively recent smartphone, though, the eSIM wins on sheer convenience.

It’s faster to set up, easier to manage, and one less physical thing to lose in the chaos of moving to a new country — and, if you’ve ever experienced moving to the Netherlands, you’ll know that’s already chaotic enough.

Have you made the switch to an eSIM in the Netherlands, or are you holding onto your physical SIM? Tell us in the comments!